Table of Contents
ToggleComcast stepped into the home security space years ago, and by 2026, their Xfinity camera lineup has evolved into a legitimate contender for homeowners who already bundle internet and cable through the provider. If someone’s looking to add surveillance without juggling multiple service accounts, Xfinity cameras offer a streamlined option. But these aren’t standalone plug-and-play devices, they tie directly into Comcast’s ecosystem, with subscription plans, installation requirements, and integration quirks worth understanding before mounting anything to a wall or soffit.
Key Takeaways
- Comcast security cameras (Xfinity Home) work best for existing Comcast internet customers seeking unified control and professional 24/7 monitoring, but require ongoing subscription plans starting at $30/month for cloud storage and features.
- Xfinity cameras are fixed to Comcast’s ecosystem with no local storage option, creating vendor lock-in that makes them impractical for renters or customers planning to switch internet providers within two years.
- Installation can be self-managed for basic indoor or single outdoor setups near existing outlets, but outdoor cameras require weatherproof power solutions and proper mounting between 7-10 feet high to capture facial details and deter tampering.
- Xfinity offers only 1080p HD video with basic motion detection and two-way audio, lagging behind competitors in resolution and AI features, though the outdoor model includes a 100-decibel siren for additional security deterrence.
- Professional installation costs $99–$149 and makes sense for complex exterior wiring or multi-story setups, while hardware pricing ranges from $120–$150 for indoor cameras to $180–$220 for outdoor units, often tied to two-year contracts with early termination fees.
- The lack of battery-powered or local-storage options limits placement flexibility compared to alternatives like Ring and Arlo, which offer greater independence from internet connectivity and subscription requirements.
What Is Comcast’s Security Camera System?
Comcast’s security camera system operates under the Xfinity Home brand, a suite of smart home and security products integrated with their internet service. Unlike standalone camera systems from Ring or Arlo, Xfinity cameras require an active Xfinity Home subscription and typically work best with Comcast’s broadband service.
The cameras connect through a central hub, the Xfinity Home touchscreen controller, which also manages door sensors, motion detectors, and smart locks. This hub communicates with cameras via Wi-Fi or a proprietary wireless protocol, depending on the model. For renters or homeowners without Comcast internet, this system isn’t a practical choice. It’s designed for existing Comcast customers who want unified control through a single app.
Xfinity cameras store footage in the cloud, not on local SD cards or NVRs. That means no physical storage to manage, but it also means subscription fees are non-negotiable for accessing recorded video beyond live viewing. The system integrates with voice assistants like Alexa and Google Assistant, allowing users to pull up live feeds on smart displays or TVs.
Key Features of Xfinity Camera Options
Xfinity cameras in 2026 come with a baseline set of features common across most modern surveillance systems: 1080p HD video, night vision, two-way audio, and motion detection. The cameras use infrared LEDs for night vision, effective up to about 30 feet in total darkness, though performance drops in heavy fog or rain.
Motion detection can be customized through activity zones in the Xfinity Home app, allowing users to ignore high-traffic areas like sidewalks or streets and focus on entryways or driveways. The system sends push notifications when motion triggers, and users can review clips stored in the cloud. Person detection is available on higher-tier plans, using AI to differentiate between people, vehicles, and animals, reducing false alerts from passing cars or neighborhood cats.
Two-way audio quality is adequate for basic communication (“package is here” or “don’t touch that”) but doesn’t compete with dedicated video doorbells in clarity. The microphone picks up sound within about 15 feet, and the speaker is loud enough to hear outdoors in moderate wind.
Indoor vs. Outdoor Camera Models
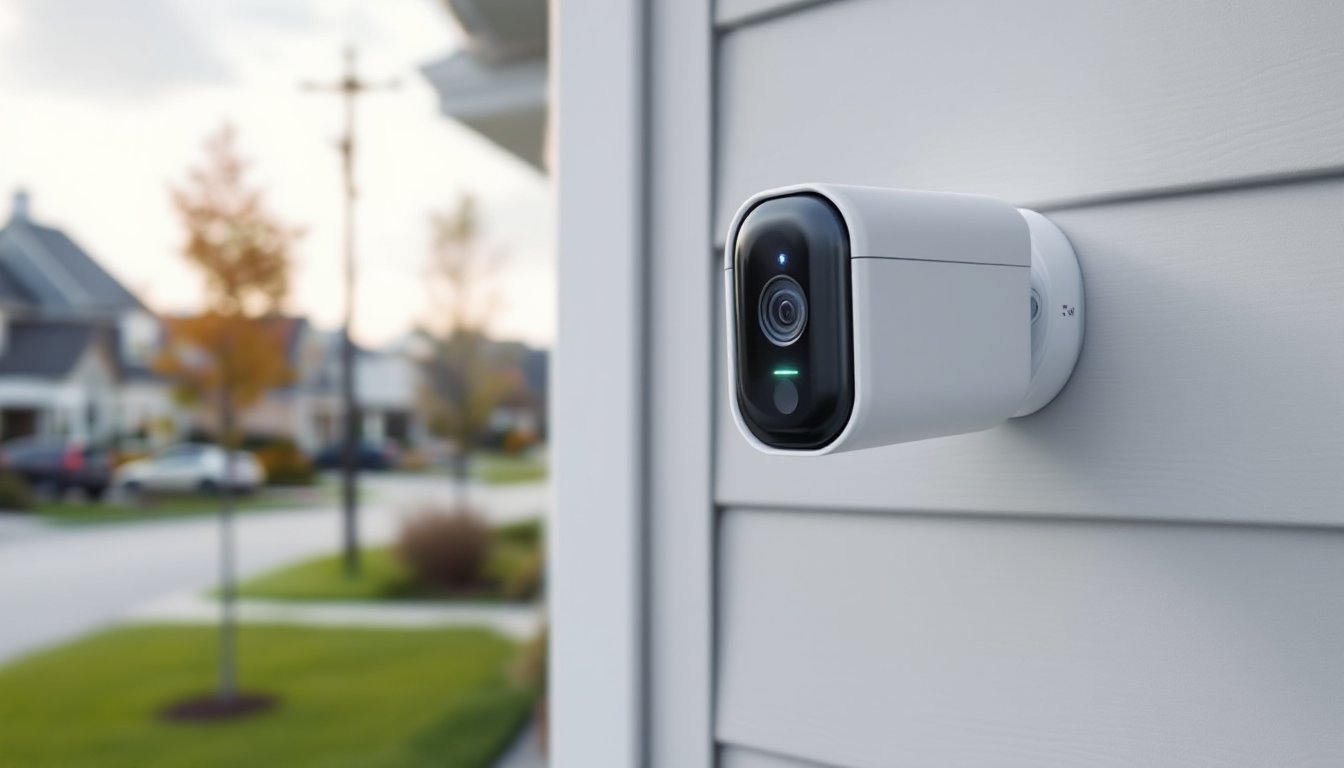
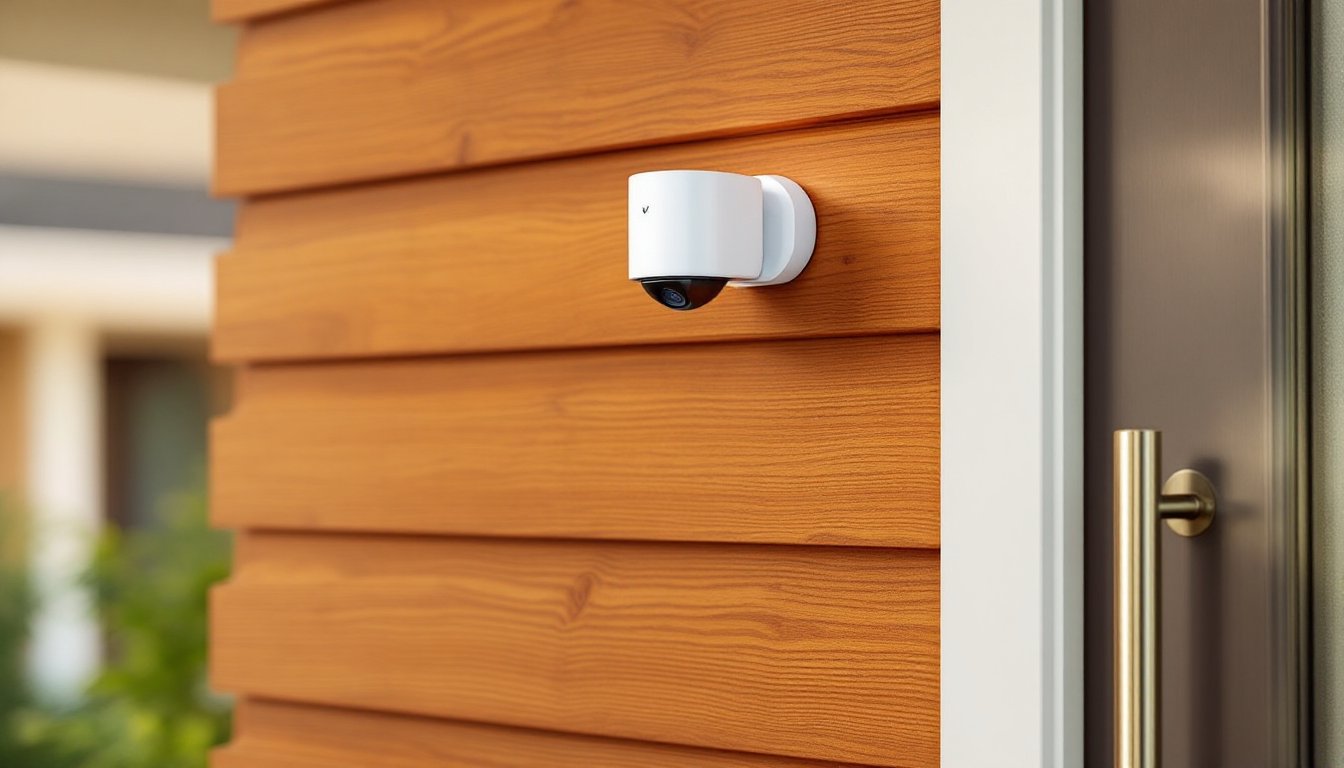
Xfinity offers distinct indoor and outdoor camera models, each built for specific environments. The indoor camera is a compact, swivel-mount unit designed for shelves, desks, or wall brackets. It lacks weatherproofing and operates on a standard USB power supply, making it unsuitable for garages, covered porches, or anywhere humidity or temperature swings occur. It’s rated for 32°F to 104°F, so unheated spaces in northern climates are off-limits in winter.
The outdoor camera is IP65-rated, meaning it handles rain, snow, and dust without issue. It mounts via a magnetic base or screw-on bracket and requires a weatherproof power source, either a nearby outdoor outlet or hardwiring through an exterior junction box. Comcast doesn’t include a weatherproof outlet cover in the kit, so DIYers need to pick up a while-in-use cover (NEMA 3R rated) separately if plugging into an existing outlet.
Outdoor cameras include a 100-decibel siren that can be triggered manually or set to activate during motion events. It’s loud enough to startle intruders but won’t replace a full security alarm system. Battery-powered models aren’t available in the Xfinity lineup as of 2026, all cameras require continuous power, which limits placement flexibility compared to competitors offering rechargeable units.
How to Install Your Comcast Security Camera
Comcast offers professional installation for a flat fee (around $99 to $149 as of early 2026, depending on the market), or users can opt for self-installation with a shipped kit. Professional installation makes sense if running new exterior wiring or mounting cameras above the first-story roofline. For a single indoor camera or a straightforward outdoor mount near an existing outlet, self-installation is manageable for most DIYers.
Materials and tools needed:
- Xfinity camera (indoor or outdoor model)
- Power source (outdoor outlet with weatherproof cover, or hardwired junction box)
- Mounting hardware (included: magnetic base or screw bracket)
- Drill with 5/32″ bit (for masonry anchors) or 1/8″ bit (for wood/vinyl)
- #6 x 1-1/4″ stainless steel screws (for outdoor mounts on wood siding)
- Smartphone with Xfinity Home app installed
- Ladder (for above-door or soffit mounts)
- Cable clips (if routing power cord along siding or trim)
Installation steps:
-
Choose the mounting location. Outdoor cameras should cover entry points (front door, garage, side gates) with a clear line of sight. Avoid pointing cameras directly at bright light sources (streetlights, setting sun) to prevent glare and overexposure. Mount height should be 7 to 10 feet, high enough to avoid tampering but low enough to capture facial details.
-
Test the Wi-Fi signal. Before drilling, plug in the camera temporarily and check signal strength in the app. If the connection drops or lags, the camera is too far from the router or separated by too many walls. A Wi-Fi extender or mesh node may be needed. Exterior cameras on detached garages or outbuildings often struggle without a dedicated access point.
-
Mount the bracket. For wood siding, drill pilot holes with a 1/8″ bit and drive stainless screws directly into the sheathing or, better, into a stud if accessible. For brick or stucco, use a 5/32″ masonry bit, tap in plastic anchors, then screw the bracket in place. Vinyl siding requires care, don’t overtighten screws, or the siding will crack. Mount to the trim board or use vinyl siding hooks designed for lightweight hardware.
-
Run power. If using an outdoor outlet, plug in the camera and secure the power cord with UV-resistant cable clips spaced every 12 inches along trim or siding. Avoid stapling through the cord. For hardwired installations, turn off the circuit breaker, connect the camera’s pigtail wires to the junction box using wire nuts (typically 14 AWG solid to 16 AWG stranded), and seal the box with a weatherproof cover. If unfamiliar with electrical work, hire a licensed electrician, outdoor wiring must meet NEC Article 110 requirements for wet locations.
-
Pair the camera. Open the Xfinity Home app, select “Add Device,” and follow the on-screen prompts. The camera will emit a chime or flash an LED when it’s ready to pair. Enter the Wi-Fi password (cameras connect to 2.4 GHz networks only, not 5 GHz), and wait for confirmation. Test the live feed, adjust the camera angle, and configure motion zones.
Safety note: Always wear safety glasses when drilling overhead, and use a fiberglass ladder (not aluminum) if working near electrical service lines. If mounting above the second story or on a steep roof pitch, this is a job for a professional.
Many homeowners installing outdoor cameras face challenges with home security systems that require coordination between multiple devices and protocols.
Pricing and Subscription Plans Explained
Xfinity cameras are sold outright or financed through monthly installments bundled with the subscription. As of early 2026, an indoor camera retails for around $120 to $150, while an outdoor camera runs $180 to $220. Multi-camera kits offer slight discounts, but expect to pay roughly $400 to $500 for a two-camera starter setup.
The hardware cost is only part of the equation. Xfinity Home subscriptions are required for cloud storage and most smart features. The base Secure plan (around $30/month) includes 24/7 professional monitoring, cellular backup, and 24 hours of video storage. For longer retention, the Secure Plus plan (around $45/month) extends storage to 30 days and adds person detection and smart automation features.
Without a subscription, users can view live feeds only, no recording, no playback, no alerts. That’s a significant limitation compared to competitors like leading home security cameras that offer local storage or free cloud tiers.
Installation fees (if opting for professional setup) are separate and typically $99 for the first device, with additional charges for complex runs or multi-story installations. Self-install kits ship free with a subscription but may incur a $50 activation fee depending on the current promotion.
Contract terms matter. Xfinity often requires a two-year agreement for discounted hardware pricing. Early termination fees can run $200 to $300, so this isn’t a trial-and-error system. Homeowners planning to move or switch providers within two years should factor that into the decision.
Pros and Cons: Is Comcast Right for Your Home?
Xfinity cameras make the most sense for households already using Comcast for internet and TV. The integration is seamless, one app, one bill, one support line. For existing Xfinity customers, adding cameras to an active Home subscription is straightforward and avoids juggling separate accounts with Ring, Nest, or Arlo.
The professional monitoring option is a genuine advantage for families who want 24/7 dispatch to local authorities. Most DIY camera systems don’t include monitoring unless users subscribe to third-party services, which can cost as much or more than Xfinity’s bundled plan.
On the downside, vendor lock-in is real. The cameras won’t function without Comcast service, so switching internet providers means losing the security system. There’s no option to migrate footage or repurpose the hardware with another platform. That’s a dealbreaker for renters or households in areas with better broadband alternatives.
The lack of local storage is another limitation. Cloud-only storage means reliance on Comcast’s servers and ongoing subscription costs. If the internet goes down, even briefly, cameras can’t record locally. Some competitors like Wyze and Eufy offer microSD slots as backup.
Feature-wise, Xfinity cameras lag behind category leaders. Top home security cameras in 2026 offer 2K or 4K resolution, advanced AI tracking, and spotlight/floodlight combos. Xfinity sticks with 1080p, basic motion zones, and no onboard sirens (except the outdoor model’s 100-decibel alert). For users prioritizing cutting-edge specs, other platforms deliver more innovation.
Customer service is hit-or-miss. Comcast’s reputation for support varies widely by region. When cameras work, they’re reliable. When issues arise, pairing failures, app glitches, billing errors, resolution can take multiple calls and long hold times.
Who should consider Xfinity cameras:
- Existing Comcast internet/TV customers who value single-vendor simplicity
- Homeowners wanting professional monitoring without separate alarm contracts
- Users comfortable with cloud-only storage and subscription fees
Who should look elsewhere:
- Renters or households planning to switch internet providers
- DIYers wanting local storage, battery-powered cameras, or platform flexibility
- Users seeking 2K/4K resolution or advanced AI features
Conclusion
Xfinity cameras work well within Comcast’s ecosystem but lack the flexibility and cutting-edge features of standalone systems. For existing customers prioritizing simplicity and bundled billing, they’re a practical add-on. For everyone else, comparing subscription costs, hardware specs, and long-term flexibility against competitors is time well spent before committing to a two-year contract.