Table of Contents
ToggleInstalling a security camera in the corner of a room or along the exterior eaves isn’t just convenient, it’s strategic. Corners provide the widest field of view with the least amount of hardware, reducing blind spots and cutting down on equipment costs. Whether monitoring a front porch, garage, or living room, corner-mounted cameras deliver comprehensive coverage that wall-centered placements can’t match. This guide walks through why corners work, which camera types fit best, and how to install them correctly without hiring a pro.
Key Takeaways
- Corner security camera placement provides the widest field of view with minimal hardware, reducing blind spots and equipment costs by eliminating the need for multiple devices around a perimeter.
- Dome cameras work best for discreet indoor corners with IR night vision, while bullet and turret cameras offer better visibility and aiming flexibility for outdoor corners and deterrent purposes.
- Successful corner security camera installation requires solid backing (studs or fasteners rated for at least 20 lbs), weatherproof cable management, and proper leveling before final tightening.
- Choose camera resolution based on your needs: 4MP–8MP for facial recognition or license plate reading, or 2MP/1080p for general activity monitoring.
- PoE (Power over Ethernet) cameras simplify corner installs by delivering power and data through a single cable, while wireless models offer easier retrofits but may struggle with connectivity in remote corners.
- Plan for adequate night vision range (at least 50 feet for roof-mounted cameras) and check that outdoor mounting locations provide proper weatherproofing with sealed cable entries and UV-rated materials.
Why Corner Placement Is the Smart Choice for Home Security Cameras
Corners offer two advantages that matter most in security coverage: geometry and deterrence. When a camera sits at the intersection of two walls, it naturally scans both planes with minimal lens distortion. A 90° or 110° field of view from a corner can monitor an entire room or yard quadrant, whereas the same camera centered on a single wall captures only half the space.
From a practical standpoint, corner mounting also simplifies cable runs. Electrical boxes are often located near wall intersections, and routing low-voltage wiring or Ethernet through an attic or crawlspace is easier when you’re working at a structural junction. If the installation is outdoors, soffit intersections at roof corners provide natural weather protection for junction boxes and cable entry points.
Visibility plays a role, too. A camera in a corner is harder to approach undetected, an intruder can’t hug a single wall to stay out of frame. For indoor cameras, corner placement keeps the device out of the way of furniture, artwork, and daily traffic, reducing the chance of accidental bumps or obstructions.
One often-overlooked benefit: corners reduce the need for multiple cameras. Instead of installing three or four devices around a perimeter, two corner-mounted units can often cover the same area. That means fewer power drops, less network congestion, and simpler monitoring software.
Before choosing a corner spot, confirm the camera’s field of view (FOV) specification. A 90° lens mounted flush in a 90° corner will capture both walls but may miss activity directly below the mount. A wider FOV, 110° to 130°, offers better downward coverage but can introduce barrel distortion at the edges. Match the lens angle to the corner’s geometry and the area you need to monitor.
Types of Corner Security Cameras for Your Home
Not all cameras are built for corner mounting. Some housings are designed specifically for angled installation, while others require aftermarket brackets or adapters. Here’s what works best.
Dome Cameras for Discreet Corner Monitoring
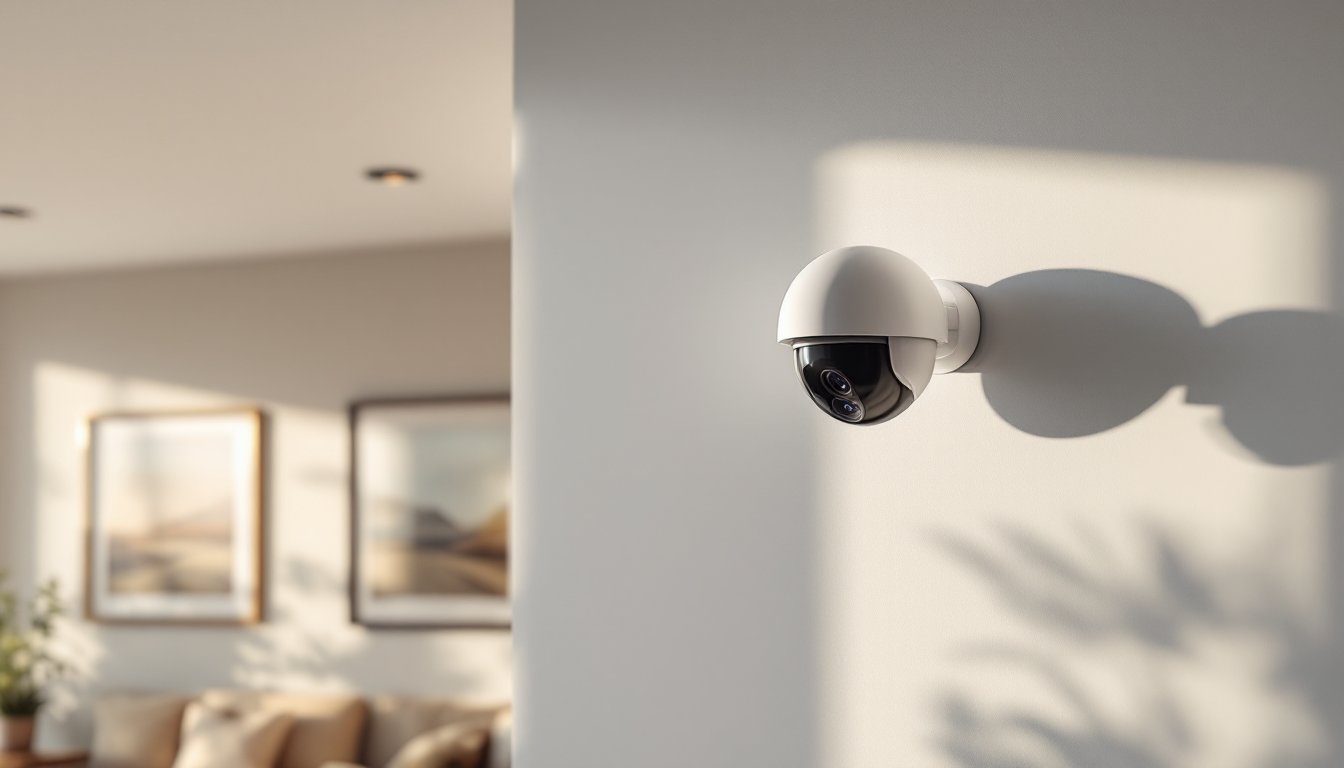
Dome cameras feature a low-profile hemisphere that sits flush against a mounting surface, making them popular for indoor corners and covered outdoor soffits. The dome housing conceals the lens direction, which discourages tampering and keeps the camera’s exact aim ambiguous.
Most dome models include a three-axis gimbal inside the housing, allowing the installer to adjust pan, tilt, and rotation after the base is mounted. This is critical for corner placement, where the camera may need to point diagonally downward or along one wall more than the other.
For indoor use, look for domes with infrared (IR) LEDs rated for at least 30 feet of night vision. Corners tend to be darker than wall centers due to shadows from adjacent surfaces, so onboard IR is essential. Avoid domes with reflective housings in tight corners, the IR bounce can cause washout or glare on nearby walls.
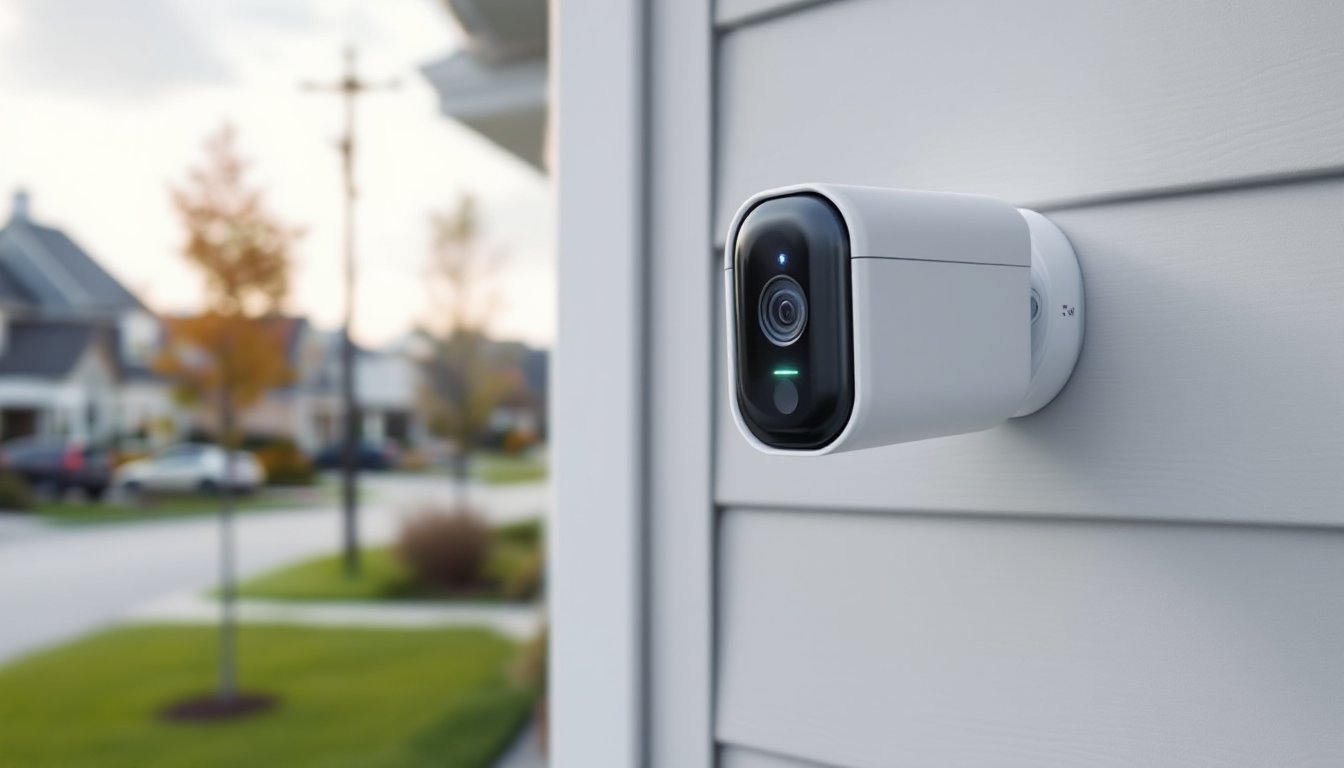
Outdoor domes should carry an IP66 or IP67 weatherproof rating, especially if mounted under eaves where wind-driven rain can reach. Some dome cameras marketed as “vandal-resistant” include polycarbonate or metal housings: these are overkill for most residential installs but make sense for garages or driveways where the camera might get hit by a ladder or sports equipment.
Many corner security cameras now offer wide dynamic range (WDR) imaging, which balances bright and dark areas in the same frame, useful when a corner camera faces a window or door with strong backlighting.
Bullet and Turret Cameras for Targeted Coverage
Bullet cameras are cylindrical units that mount on an adjustable bracket, making them ideal for exterior corners where a visible deterrent is desired. The bracket allows precise aiming, and the long housing accommodates larger lenses and more powerful IR illuminators, often 60 to 100 feet.
Bullet cameras work best at roof eaves or under porch corners where the bracket can be screwed into solid wood (a fascia board, soffit junction, or rafter tail). The bracket typically includes a cable pass-through, which keeps the junction box hidden behind the camera body. For PoE (Power over Ethernet) installs, this pass-through simplifies wiring by letting you run a single Cat5e or Cat6 cable from the attic directly to the camera.
One downside: bullet cameras are more exposed to the elements. Even with an IP rating, the lens is prone to spider webs, pollen buildup, and condensation. Plan to clean the lens every few months if the camera is in a humid or wooded area.
Turret cameras (sometimes called “eyeball” cameras) split the difference between domes and bullets. They feature a ball-and-socket mount that allows multi-axis adjustment, with a compact housing that’s less obtrusive than a bullet but easier to aim than a dome. Turrets are gaining popularity for corner installs because they offer the aiming flexibility of a bullet without the long profile.
For corner placement, turrets excel when mounted at the junction of an exterior wall and soffit. The compact design fits into tight spaces, and the ball joint lets the installer dial in the exact angle without shimming or custom brackets. Many turret models from brands like Hikvision and Dahua include built-in microphones and dual IR/white light illuminators, which can be useful for corner cameras covering driveways or side yards.
When comparing top-rated models, pay attention to the camera’s varifocal vs. fixed lens spec. A varifocal lens (typically 2.8–12 mm) lets you zoom and refocus after installation, which is helpful if you’re not sure how much of the yard or room you want in frame. Fixed lenses (usually 2.8 mm or 3.6 mm) are simpler and cheaper but lock you into one field of view.
How to Choose the Right Corner Security Camera
Start with the resolution you need. For facial recognition or license plate reading, a 4MP or 8MP sensor is the baseline. Lower resolutions (2MP/1080p) work for general monitoring where you just need to confirm activity, not identify individuals. Keep in mind that higher resolution requires more storage and network bandwidth, an 8MP camera recording 24/7 can generate 60–100 GB per week.
Next, decide between wired and wireless. Wired cameras (PoE or coaxial) are more reliable for corner mounts, especially outdoors, because they don’t depend on Wi-Fi signal strength. Running cable to a corner is usually straightforward if you have attic or crawlspace access. Wireless models are easier for retrofits but can struggle with connectivity if the corner is far from the router or blocked by HVAC ducts and insulation.
For outdoor corners, night vision range matters more than most homeowners expect. A camera mounted at a roof corner might be 12 to 15 feet above ground, which extends the effective range but also raises the mounting angle. Look for cameras with IR LEDs rated for at least 50 feet to compensate for the height and angle.
Smart features like motion detection zones, person/vehicle detection, and two-way audio add convenience but also increase cost and complexity. If the camera will be monitored through a dedicated NVR (network video recorder), these features are often handled by the NVR software. If using a standalone Wi-Fi camera, the smart features are built into the camera’s firmware and mobile app.
Many 360-degree and smart-enabled models now include edge-based AI processing, which reduces false alerts from swaying branches or passing cars. This is especially useful for corner cameras that cover large open areas like driveways or backyards.
Power source is the final consideration. PoE cameras require a PoE switch or injector, but they simplify installation by delivering power and data over a single cable. Battery-powered cameras work for temporary setups or rental properties but need recharging every 2–6 months depending on activity and temperature. Hardwired AC cameras are reliable but require access to a nearby outlet or junction box.
If the corner you’re targeting is near a bathroom, kitchen, or exterior outlet, check if the existing circuit can handle the additional load. Most PoE cameras draw 4–13 watts: a typical 15-amp household circuit can support dozens without issue, but confirm the camera’s power draw against your circuit’s capacity if you’re daisy-chaining multiple devices.
Installation Tips for Corner-Mounted Security Cameras
Find the studs or solid backing. Interior corners usually meet at a stud or corner bead. Use a stud finder to locate solid wood, especially if mounting a heavier camera or one with a metal bracket. For drywall-only corners, use toggle bolts or molly anchors rated for at least 20 pounds to prevent sagging over time.
Exterior corners at roof eaves often intersect with fascia boards, rafter tails, or soffit framing. Aim to screw into solid lumber, 1.5-inch #10 stainless steel screws work well for most outdoor mounts. Avoid relying solely on soffit panels, which are often vinyl or thin aluminum and won’t hold weight.
Run the cable before mounting the camera. For PoE or coaxial installs, drill a ½-inch hole through the soffit or interior wall at the corner, then feed the cable from the attic or basement. If running cable outdoors, use UV-rated Cat6 or direct-burial cable and seal the entry point with silicone caulk or a weatherproof grommet. Indoor runs can use standard Cat5e or Cat6.
If you’re installing a battery or solar-powered camera, confirm the corner location gets adequate sunlight (for solar) or is accessible for periodic battery swaps. Corners under deep eaves or inside covered porches may not receive enough light for solar charging.
Level and aim before tightening. Most corner cameras include a mounting template or base plate. Attach the base loosely, check level with a torpedo level or smartphone app, then mark and drill pilot holes. Once the base is secure, attach the camera body and aim it before final tightening. For dome cameras with internal gimbals, you’ll need to remove the dome cover and adjust the lens by hand, this is easier with a second person to check the live view on a laptop or phone.
Weatherproofing and cable management are critical outdoors. Even if the camera is rated IP66, moisture can enter through poorly sealed cable runs. Use outdoor-rated junction boxes (4 x 4-inch or NEMA-rated enclosures) to house cable connections, and apply dielectric grease to Ethernet connectors before inserting them into the camera’s port. For coaxial systems, use compression F-connectors and seal them with heat-shrink tubing.
Indoor corner cameras rarely need special weatherproofing, but cable management matters for aesthetics and safety. Use cable raceways or paintable conduit to run wires down the corner seam and along baseboards. Avoid leaving loose cables across walkways or where furniture might pinch them.
Safety gear: Wear safety glasses when drilling overhead (to keep debris out of your eyes) and use a sturdy A-frame ladder for high corners. If working on a roof or second-story eave, use a roof harness or have a spotter. Most corner camera installs don’t require a permit, but if you’re running new electrical circuits or modifying exterior siding, check local building codes, some jurisdictions require permits for low-voltage wiring in commercial or multi-family buildings.
Conclusion
Corner-mounted security cameras deliver maximum coverage with minimal hardware, making them the go-to choice for both DIY installs and professional setups. By matching the camera type to the location, dome for discreet indoor corners, bullet or turret for visible outdoor deterrence, and following solid mounting practices, homeowners can achieve reliable surveillance without blind spots or wasted equipment. Measure twice, drill once, and don’t skip the weatherproofing.