Table of Contents
ToggleProtecting your home doesn’t require a corporate-level budget or a security specialist on speed dial. Camera DVR security systems have become the go-to choice for homeowners who want reliable, affordable surveillance without recurring cloud fees. These systems record footage directly to a hard drive, giving you full control over your security data. Whether you’re monitoring package deliveries, keeping tabs on the backyard, or adding a layer of protection while you’re away, understanding how DVR systems work, and how to choose the right one, makes all the difference.
Key Takeaways
- A camera DVR security system records footage directly to a local hard drive, eliminating monthly cloud subscription fees and giving you complete control over your security data.
- DVR systems use stable coaxial cable connections that resist Wi-Fi interference, making them reliable for homes already wired with cable or new construction projects.
- Resolution and storage capacity are critical: 1080p (2MP) is the residential standard, while a 2TB drive stores roughly 30 days of continuous 4-camera recording at that resolution.
- Install cameras at least 8–10 feet high with downward angles to prevent tampering while capturing clear facial details, and always label cables at both ends for easier troubleshooting.
- Essential features include at least 65–100 feet of infrared night vision, IP66/IP67 weatherproofing for outdoor units, wide dynamic range (WDR) for challenging lighting, and motion detection zones to reduce false alerts.
- Backup your critical footage to USB drives or cloud storage; if someone steals the DVR unit, your recordings disappear unless you’ve created copies for safekeeping.
What Is a Camera DVR Security System?
A Digital Video Recorder (DVR) security system captures video from analog cameras and stores it on a built-in or external hard drive. Unlike cloud-based systems that send footage over the internet, DVR systems keep everything local. You own the recordings, and there’s no monthly subscription eating into your budget.
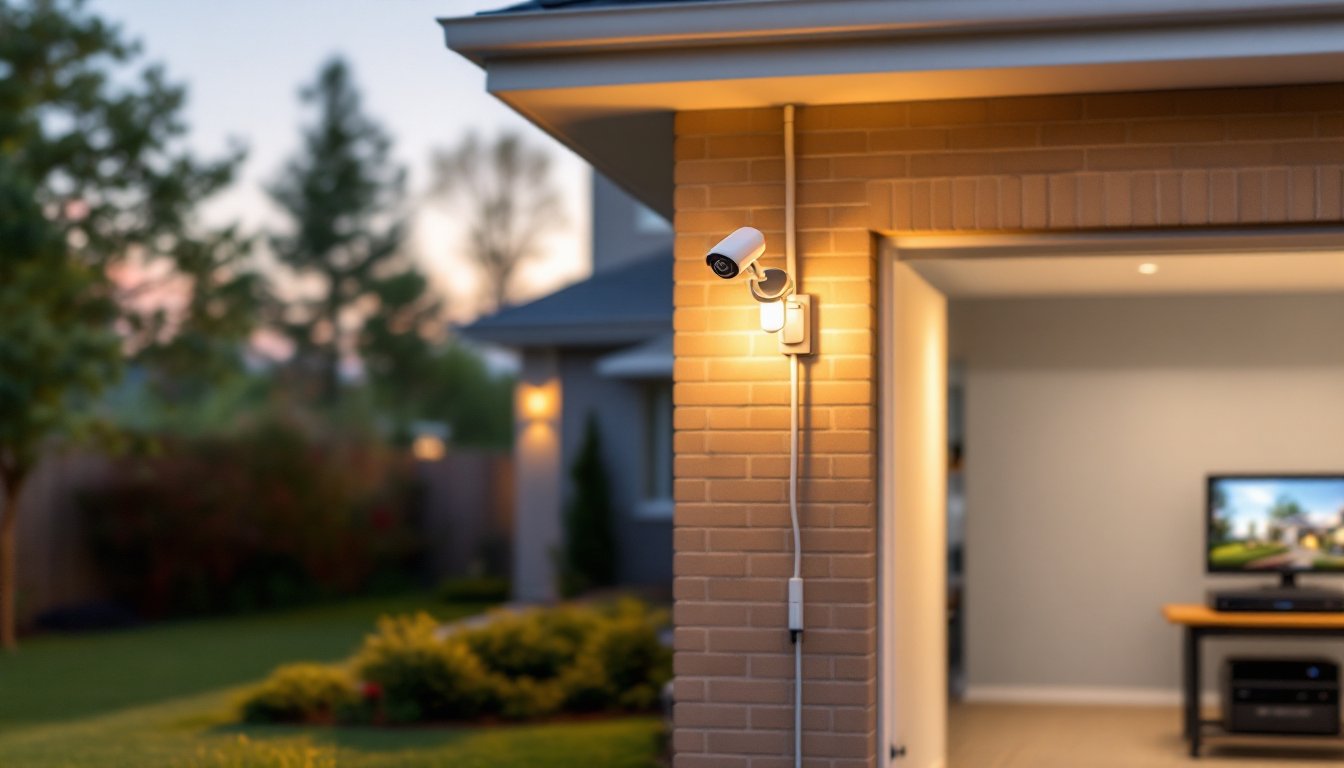
Most DVR setups use coaxial cables (typically RG59 or RG6) to connect cameras to the recorder. This wired connection provides a stable signal without the dropouts that can plague Wi-Fi systems. The DVR unit itself usually sits in a closet, garage, or utility room, anywhere with power and enough ventilation to keep the hard drive cool.
DVR systems are best suited for homes already wired with coaxial cable or new builds where running cable through walls is still straightforward. If you’re retrofitting an older home with finished walls, expect some drywall patching.
How DVR Security Systems Work
Here’s the basic signal flow: analog cameras capture video, convert light into electrical signals, and send those signals through coaxial cable to the DVR. The DVR digitizes the analog feed, compresses it (usually in H.264 or H.265 format to save space), and writes it to the hard drive.
Most modern DVR units support 4, 8, or 16 camera channels. Each channel corresponds to one camera input. If you buy an 8-channel DVR, you can connect up to eight cameras. Unused channels can be activated later if you expand your system.
The DVR connects to your home network via Ethernet, allowing you to view live or recorded footage on a smartphone, tablet, or computer. Some models include HDMI or VGA outputs so you can plug directly into a monitor for local viewing. Motion detection settings let the system record only when activity is detected, stretching your storage capacity and making it easier to review relevant clips.
Key Benefits of Installing a DVR Security System
No monthly fees. Once you buy the hardware, you’re done paying. There’s no cloud subscription, no per-camera charges, and no surprise billing when you review footage.
Local storage means local control. Your recordings stay on your property. You’re not relying on a third-party server that could go offline, get hacked, or change its terms of service. If your internet drops, the system keeps recording.
Stable, wired connections. Coaxial cable doesn’t suffer from Wi-Fi interference, weak signal zones, or bandwidth throttling. Cameras placed 300 feet from the DVR work just as reliably as those ten feet away, assuming you use quality cable.
Scalability. Start with four cameras and add more as your needs grow. Many DVR systems support mix-and-match camera types, bullet cameras for long-range viewing, dome cameras for discreet indoor monitoring, and turret cameras for vandal-resistant outdoor coverage.
Compatibility with existing infrastructure. If your home was pre-wired for an older security system or CCTV setup, a DVR system can often use those same cable runs. This saves time and keeps walls intact.
That said, DVR systems do have limitations. Analog cameras max out at lower resolutions than their IP counterparts, and cable runs require planning. If your home layout doesn’t accommodate running coax cleanly, you’ll spend time fishing wires or surface-mounting conduit.
Choosing the Right Camera DVR System for Your Home
Start by counting coverage zones. Walk your property and note entry points, blind spots, driveways, and high-traffic areas. Each zone typically needs one camera. Don’t forget side gates, basement windows, and back doors, common entry points that get overlooked.
Consider camera type and housing. Bullet cameras offer focused, long-range views and are ideal for driveways or property perimeters. Dome cameras provide a wider field of view and are harder to tamper with, making them good for porches and entryways. Turret cameras (also called eyeball cameras) split the difference, offering flexibility in aiming without the glare issues some domes have with IR night vision.
Check the DVR’s channel count. Buy at least one or two channels more than you need right now. Expanding later is cheaper if you don’t have to replace the entire DVR.
Power matters. Most cameras use 12V DC power, supplied either by individual wall adapters or a centralized power distribution box. Centralized boxes reduce clutter and make troubleshooting easier, but they create a single point of failure. Plan accordingly.
Many current systems now compete with options from well-reviewed camera and DVR bundles that balance resolution, storage, and ease of setup.
Camera Resolution and Storage Capacity
Resolution determines image clarity. Entry-level DVR cameras start at 720p (1MP), which is adequate for general monitoring but struggles with fine details like license plates or faces beyond 20 feet. 1080p (2MP) is the current standard and provides clear images for most residential needs. Higher-end systems now offer 4MP or 5MP analog cameras, which require DVRs that support those resolutions, usually labeled as HD-TVI, HD-CVI, or AHD formats.
Storage capacity depends on three factors: resolution, number of cameras, and recording schedule. A 2TB hard drive can store roughly:
- 30 days of continuous recording from four 1080p cameras
- 15 days from eight cameras at the same resolution
- Longer if you use motion-triggered recording instead of 24/7 capture
Most DVRs accept standard 3.5-inch SATA hard drives. Surveillance-rated drives (like Western Digital Purple or Seagate SkyHawk) are built for constant write cycles and run cooler than standard desktop drives. They cost slightly more but last longer under continuous use.
Compression format also affects storage. H.265 (HEVC) uses about half the space of older H.264 while maintaining similar quality. If your DVR supports H.265, enable it, you’ll double your effective storage.
Some top-rated security systems now offer advanced compression and AI-based motion zones to maximize storage efficiency.
DIY Installation vs. Professional Setup
DIY installation is realistic if you’re comfortable running cable, drilling through exterior walls, and mounting hardware. You’ll need:
- Drill with masonry and wood bits
- Fish tape or rods for running cable through walls
- Crimping tool and connectors if you’re terminating your own coax
- Ladder tall enough to reach eaves or second-story mounting points
- Voltage tester to avoid drilling into live electrical lines
Plan cable routes before you drill. Exterior cameras usually require a hole through the siding and sheathing, sealed with caulk to prevent water intrusion. Interior runs can follow basements, crawlspaces, or attics. Avoid running coax parallel to electrical wiring for more than a few feet, it can introduce interference.
Mount cameras at least 8–10 feet high to prevent tampering but low enough to capture faces clearly. Angle downward slightly. Test each camera’s view on a monitor before you finalize the mount and secure all cables.
Professional installation makes sense if:
- Your home has no accessible attic or crawlspace
- You need cameras on a multi-story exterior with limited safe ladder access
- You want the system integrated with existing smart home or alarm infrastructure
- Local code requires permitted work for low-voltage installations (rare, but it happens)
Pros bring specialized tools (cable testers, thermal cameras for finding studs, bore scopes) and insurance. Expect to pay $200–$500 for labor on a typical 4–8 camera install, depending on your region and site complexity.
Whether you DIY or hire out, label every cable at both ends. Use a label maker or colored tape. Future you will appreciate it when troubleshooting or adding cameras.
Top Features to Look for in Modern DVR Security Cameras
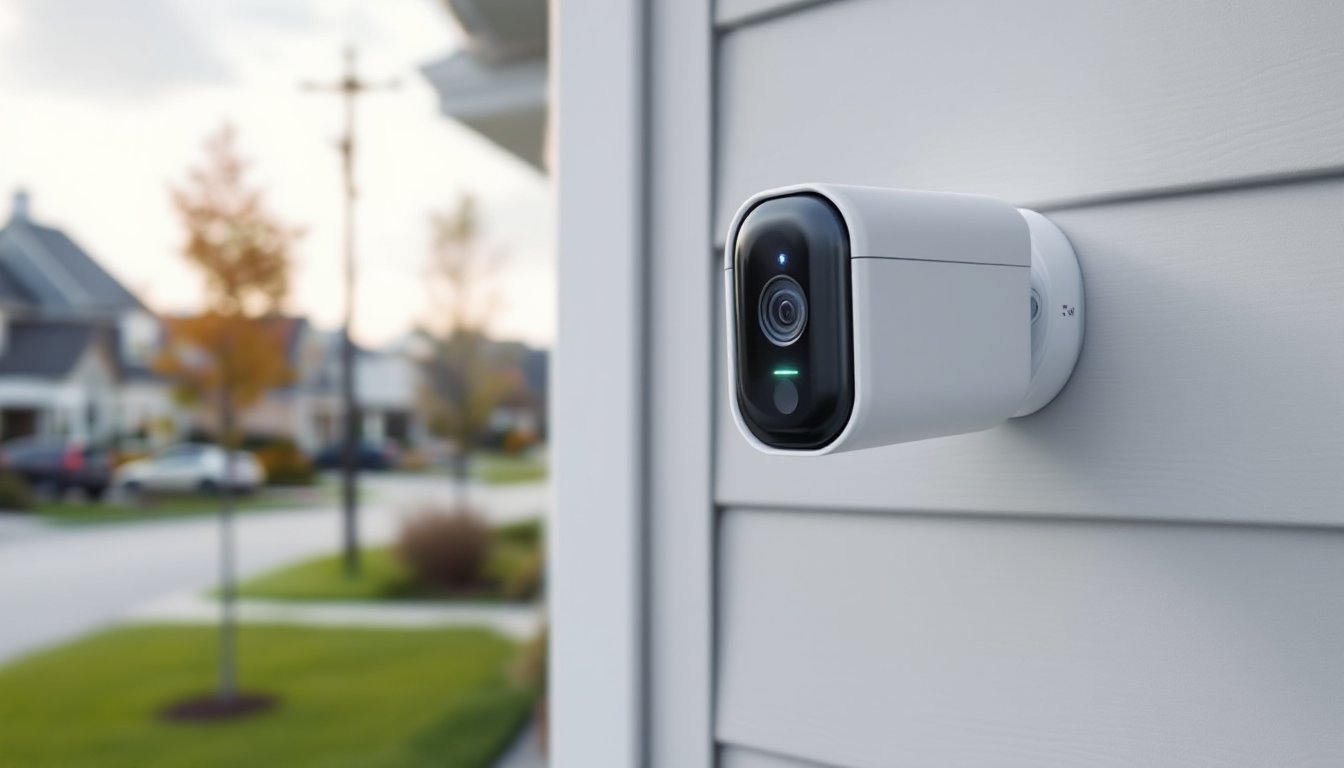
Infrared (IR) night vision is non-negotiable for outdoor cameras. Look for models with at least 65–100 feet of IR range. The effective range depends on camera positioning and ambient light, but more IR LEDs generally mean better low-light performance. Be aware that IR can reflect off nearby surfaces (like eaves or walls), creating glare. Position cameras to minimize these reflections.
Weatherproofing ratings matter. Outdoor cameras should meet at least IP66 or IP67 standards, meaning they’re dust-tight and protected against heavy rain and temporary water immersion. Metal housings outlast plastic in direct sun and freezing temps.
Wide dynamic range (WDR) helps cameras handle challenging lighting, like a shadowy porch with bright sunlight in the background. Without WDR, you’ll often get a silhouette instead of a clear image. It’s a must-have for entryways and any camera aimed toward a sunrise or sunset.
Motion detection zones let you define active areas within the camera’s field of view. If tree branches sway at the edge of the frame, you can exclude that zone and avoid hundreds of false alerts. Many DVRs also offer sensitivity adjustments to fine-tune triggers.
Mobile app access has become standard. Make sure the DVR manufacturer offers a stable, updated app for iOS and Android. Read recent app reviews, lagging software updates or clunky interfaces can cripple an otherwise solid system. Independent testing from sources like expert security camera reviews highlights which apps deliver reliable performance.
Audio recording is available on some DVR cameras, but check your local laws. Some states require two-party consent for audio surveillance. Even where it’s legal, audio can complicate privacy expectations, especially if cameras cover shared driveways or sidewalks.
Tamper alerts notify you if a camera is moved, covered, or disconnected. It’s a simple feature that can make a real difference if someone tries to disable a camera before entering.
Finally, backup options add a safety net. Some DVRs support automatic cloud backup (often for a fee) or allow manual offloading of critical clips to a USB drive. If someone steals the DVR, your footage goes with it unless you’ve backed it up.